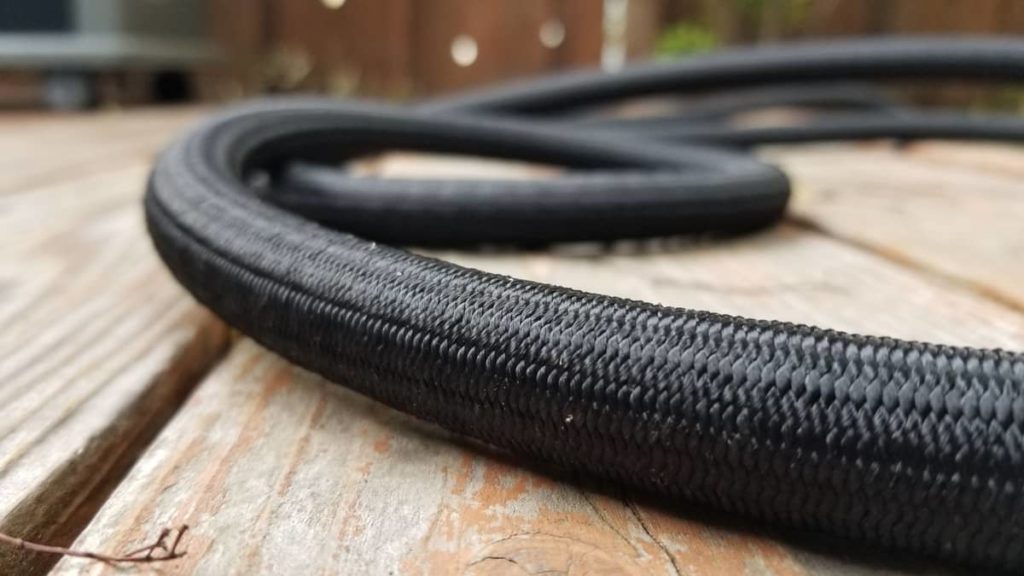
Few things are more frustrating than discovering your garden hose is leaking at the connection or that the hose has sprung a leak! Whether it’s a slow drip or a steady stream these leaks not only disrupt the smooth flow of watering but also lead to significant water wastage. The inconvenience of constantly refilling water tanks or the cost of water lost to leaks can quickly add up. Not to mention the potential damage to surrounding plants and landscaping. However, addressing these leaks promptly isn’t as hard as you think and will save you time and money!

Understanding the Problem
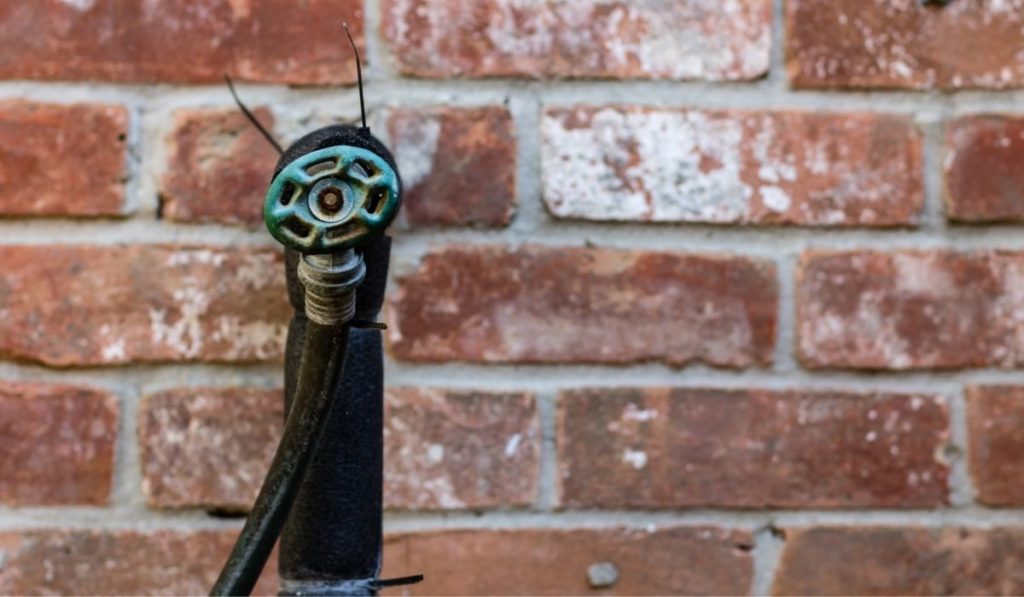
In the realm of garden hose maintenance, understanding why leaks occur on an outside hose connection are fundamental to effective troubleshooting.
Leaks often stem from a combination of factors:
- worn-out washers
- loose connections
- damaged threads
Over time, the constant exposure to water, sunlight, and varying temperatures can degrade the integrity of these components. Leading to compromised seals between the hose and its attachments. Consequently, even minor wear and tear can lead to leaks which gradually worsen if left unaddressed.
It’s crucial as gardeners to pinpoint the root cause of the leak before embarking on any repair efforts as a misdiagnosis could result in ineffective solutions or further damage to the hose. By identifying the underlying issue accurately you can implement targeted repairs that restore the hose’s functionality and prevent future leaks.
How to Diagnose the Leak?
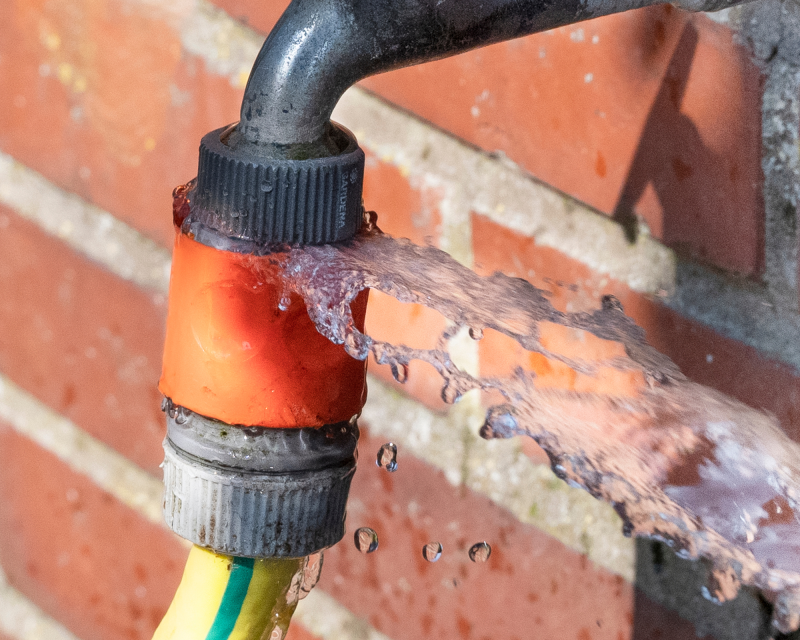
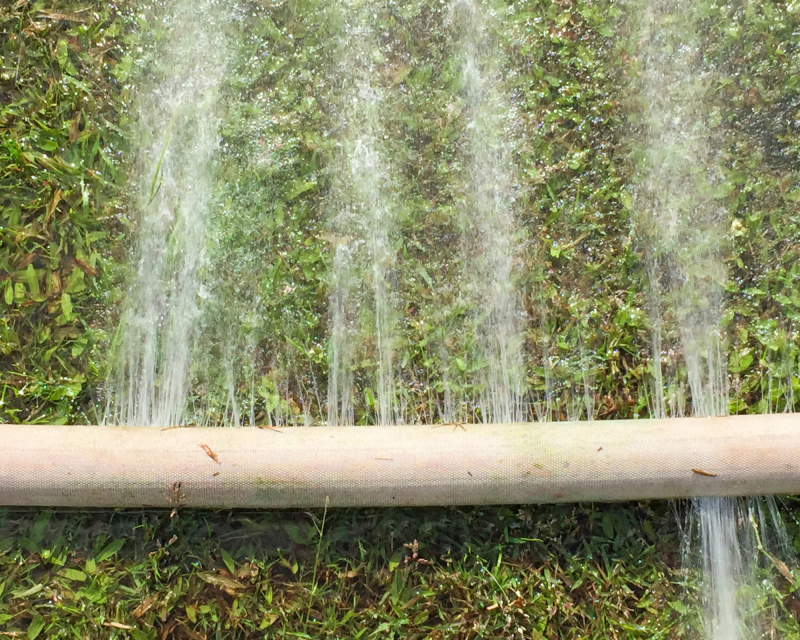
When you discover a garden hose leak a systematic approach to diagnosis is your best way forward. Begin by conducting a thorough inspection of the hose and its connections. Some leaks might be easy to spot with water spraying out, while others may be small and hard to spot without closer inspection.
- Start by visually examining the entire length of the hose.
- Pay close attention to areas near the connections.
- Look for signs of water pooling, dripping, or any unusual bulges or deformations in the hose material.
- Listen for hissing sounds -this can indicate a leak under pressure.
- Inspect both ends of the hose including any attachments such as spray nozzles or spigots.
- Check for visible signs of leakage -such as water seeping from the connection points or around the threads.
- Run your hands along the hose while doing these checks as this can help detect subtle leaks that may not be immediately visible.
Repair Your Leaking Hose and Tap Connections
Before starting your garden hose repair process, it’s crucial to gather the necessary tools and materials to ensure a smooth and efficient fix. Here’s a list of essential items for repairing a garden hose leak:
1. Adjustable wrenches: These versatile tools are indispensable for tightening or loosening hose connections securely.
2. Replacement washers: Often made of rubber or neoprene, these small circular seals are inserted into hose connectors to create a watertight seal.
3. Plumber’s tape (Teflon tape): This thin, white tape is wrapped around the threaded ends of hose connections to help prevent leaks by filling gaps and creating a tighter seal.
4. Hose repair kits: These comprehensive kits typically include various fittings, connectors, and clamps designed to address common hose issues such as leaks, punctures, or cracks.
It’s important to gather all necessary tools and materials before beginning the repair process. Running back and forth to retrieve missing items does my head in as it prolongs the repair time. You can have most of these items on hand so you can fix garden hose leaks straight away rather than having to go to the store for parts.
Additionally, making sure that the replacement parts match the specifications of the existing hose connections will help avoid compatibility issues and ensure a successful repair. With the tools and materials assembled, you can proceed with confidence, knowing they have everything they need to address the leak effectively!
Repair Methods
When addressing garden hose leaks, the repair method employed depends on the identified cause of the leak.
Loose connections
Begin by using an adjustable wrench to tighten the fittings securely. Make sure you don’t over tighten as this can damage the threads. If the leak persists, inspect the washer within the hose coupling. To replace the washer, unscrew the coupling using the wrench, remove the old washer, and insert a new one of the appropriate size. Apply plumber’s tape to the threaded ends of the hose connections before reattaching to create a better seal.
Cracks or punctures
If the leak is coming from the hose itself you may need to utilize a hose repair kit. Follow the manufacturer’s instructions for cutting out the damaged section and inserting the repair fitting. It is a pretty straightforward process and saves having to purchase a new hose.
Preventive Maintenance Tips
Preventing garden hose leaks starts with proactive maintenance practices.
Inspect: Take the time to regularly inspect your hoses when you are using them. Check for signs of wear, damage, or leaks at the connections.
Storage: Store hoses properly by coiling them loosely and avoiding exposure to direct sunlight, extreme temperatures, or sharp objects.
Usage: It is important when handling hoses to take care to avoid kinks, bends, or twists that can weaken the material and lead to leaks over time.
Quality: Investing in high-quality hoses and fittings from reputable manufacturers can also minimize the risk of leaks and ensure longevity.
By incorporating these garden hose care tips into your gardening routine you can extend the lifespan of your hoses and fittings.
Troubleshooting Common Issues
Even with proper maintenance our garden hoses and connections end up with kinks and leaks.
Connections- Stuck or rusted connections can prove difficult to loosen and require the application of penetrating oil and patience.
Stripped threads- consider using a thread repair kit or fitting with a different connection type. You may need to replace the fitting if the repair continues to leak.
Persistent leaks- may indicate underlying issues such as hose damage or improperly seated washers. Make sure you buy qualiting fittings and hoses. This will make life so much easier!
Troubleshooting tips
- double-check connections
- inspect for hidden cracks or splits in the hose
- Try different repair methods if initial attempts are unsuccessful.
- Hose leak repair tape is your best friend for leaking hoses at the connection
With a little time and patience you will become skilled at repairing your own garden watering equipment.

More Watering Less Leaking
Garden hose leaks require a bit of detective work to figure out the issue. So remember to tighten connections, replace washers, or utilize plumber’s tape for those pesky leaks. By being about to fix basic leaks you will save yourself time and money. I recommend buying quality fittings to start with. Yes, I know it feels expensive at the time but in the long run you don’t have to keep replacing and fixing the cheap connections. Same goes for your garden hoses. The cheap ones kink and crack so much faster than a good quality hose. And keep an eye out for leak proof garden hose fittings, they work great and let you get on with gardening.
We hope this article has been insightful and helpful in addressing any garden hose leaks you may encounter. We’d love to hear about your experiences with leaks and the solutions you’ve found effective.
Don’t forget to subscribe to our newsletter for more gardening tips, troubleshooting advice, and updates on new articles. Stay informed and empowered to nurture your garden to its fullest potential.
Additionally, check out our related articles and recommended products for further guidance on maintaining and caring for your garden hoses. Have a great day in the garden!